


Small venues are where most mobile DJs, indie promoters and rental crews spend their working lives: low ceilings, tight stages, audiences standing a metre from the lights. In that environment a lighting stand is not just a convenience item — it is a piece of rigging that happens to be portable. A T-bar stand or a small truss system that is set up casually can fail in ways that end a show, damage equipment, or hurt someone. The good news is that lighting stand safety on this scale is not complicated. It comes down to matching the stand to the job, respecting height and footprint, and checking a handful of mechanical details that take two minutes to inspect.
This guide walks through how experienced crews keep T-bar stands and portable truss systems safe on small stages, using examples from the LESOUND lighting stand range — including a foldable heavy-duty T-bar stand and a two-tripod truss set with a 3-metre span — to show what to look for before doors open.
Why Small Venues Are the Hard Case
Large venues have the advantages of space and infrastructure: rigged points, professional installers, load calculations, barriers between the audience and the gear. Small venues have none of that. The crew is usually one or two people, the setup window is short, and the lighting is often positioned at the edge of the stage or on the floor right beside the crowd.
That combination creates a specific risk profile:
- Low ceilings. A stand extended to its full height may put fixtures close to the ceiling, where heat builds up and where a bump from a door or a duct can shake the whole rig.
- No separation from the audience. A tripod leg in a walkway is a trip hazard, and a trip hazard connected to a T-bar full of fixtures is a tipping hazard.
- Fast turnarounds. Rushed setup is when collars get left half-tightened and pins get forgotten.
- Multi-use rooms. The same stand that was safe for a quiet acoustic night may be surrounded by a dancing crowd on Saturday.
None of these problems is solved by buying a heavier stand. They are solved by planning the placement, the height and the load distribution before the first fixture goes up.
Know What Your Stand Is Designed to Do
Every lighting stand has a rated working capacity and a maximum working height defined by its manufacturer. Those numbers exist to be followed, and they are the first thing to confirm when you take on a new venue or a new set of fixtures. As a rule of thumb for planning: the total weight of the fixtures you hang on a T-bar or truss span should stay comfortably inside the manufacturer’s rated figure for the stand, and the fixtures should be distributed so the bar stays balanced.
Design details tell you a lot about intended use. The Yinyu LS121, for example, is a foldable heavy-duty T-bar stand built entirely from steel, with a 1.2-metre T-bar carrying eight light locations on a 30×30 mm bar. Its φ35 mm upper collar accepts the same standard used by speaker stands, which means one stand design serves both lighting and PA duties on mixed rigs — useful when a small venue has no room for separate lighting and sound positions. On the opposite end of the scale, the LS008 set pairs two tripods with two 1.2-metre foldable T-bars and a 3-metre all-metal triangle truss span, reaching a working height of 3.5 metres, and packs into a carrying bag for transport.
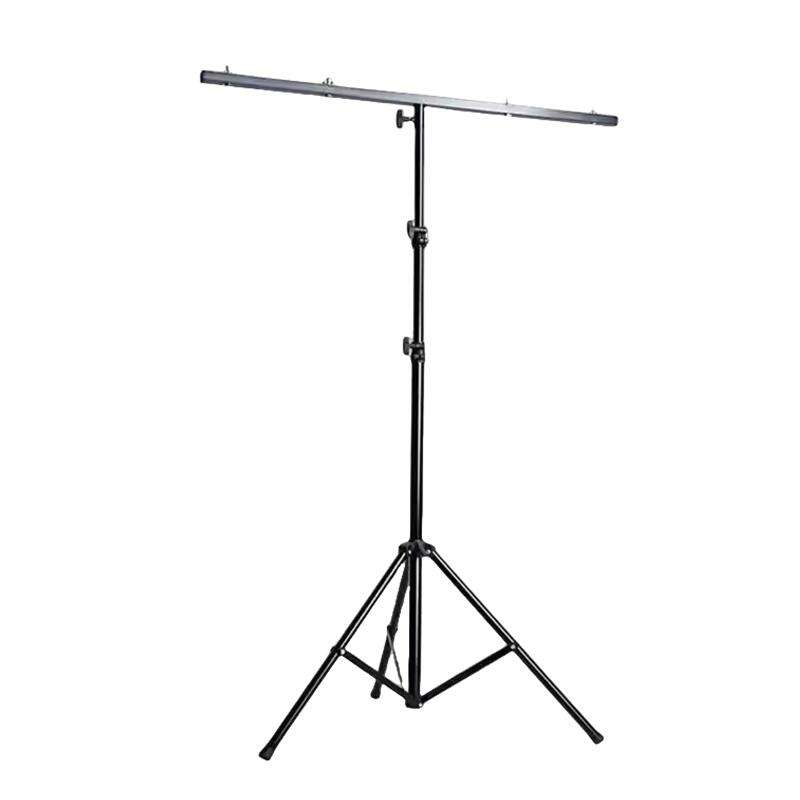
Match the fixture to the mount
LED PAR cans and small moving heads dominate small-venue rigs because they are light, but weight is not the only variable. A moving head that spins and stops puts dynamic forces into the clamp that a static PAR never does. On a T-bar, hang the heaviest fixtures closest to the upright, keep the bar level, and check that every clamp is the half-coupler or clamp type specified for the bar’s profile. On the LS008′s triangle truss span, fixtures should be clamped to the chords with a second fixing — typically a safety cable through the yoke — so that a loose clamp cannot become a falling fixture.
Height and Footprint: The Two Numbers That Matter Most
Two dimensions decide whether a lighting setup is safe in a small room: how high it goes and how much floor it claims.
Height. Extend the stand only as high as the room allows, and keep a margin between the top of the fixtures and the ceiling. A stand working at 3.5 metres, like the LS008 truss set, needs the kind of clear vertical space that small stages do not always have — measure the room before you plan the rig, not after the tripods are open. Where the ceiling is low, a single T-bar stand trimmed to a lower working height is usually the safer choice than a tall truss squeezed into the same volume.
Footprint. Tripod legs earn their stability from geometry: the wider the spread, the more resistant the stand is to tipping. Open the legs fully and evenly, never park a stand with one leg on a cable run or a floor edge, and orient the legs so no leg points into a walkway. If the stand must live near the crowd, keep it behind a line of speaker stands, DJ booth panels or barrier furniture rather than in open floor.
Outdoors or on temporary platforms, the rules tighten further: wind loading on a bar of fixtures is real even at modest heights, and a stand on a raked or flexible stage deck behaves differently from one on concrete. When in doubt, lower the rig and add distance between the stand and the audience.
The Mechanical Details That Prevent Failures
Most stand failures trace back to a few small parts. These are worth inspecting every time the rig goes up, because they are also the details that separate a purpose-built stand from a generic one.
Locking collars and secondary pins
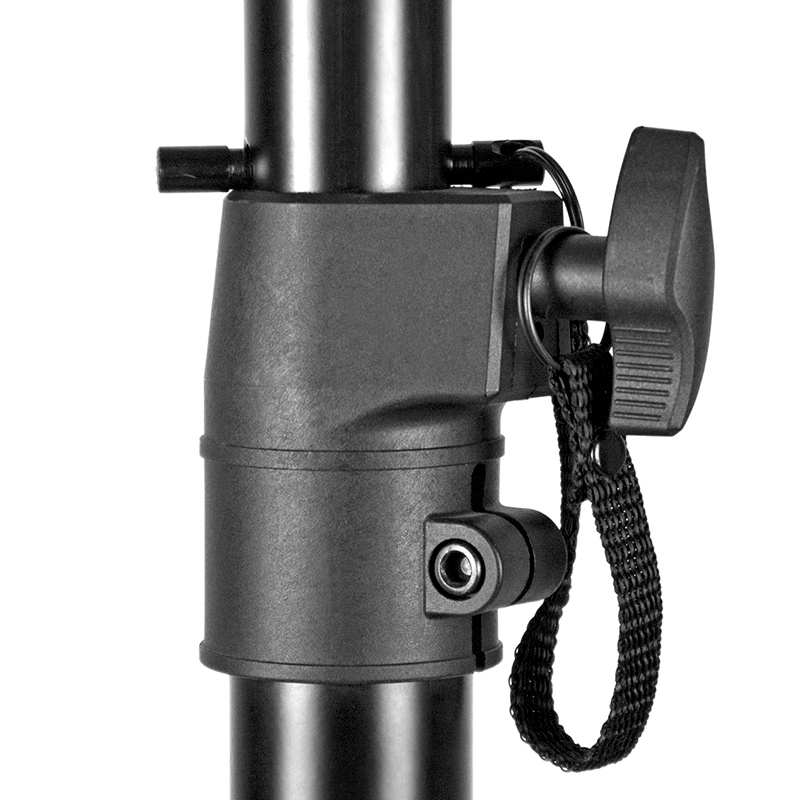
A telescopic upright is only as safe as its height clutches. Look for cast collars with a positive stop — a hole and pin that prevents the inner tube from sliding even if the knob works loose — rather than friction-only clamps. On well-designed stands the collar knob is tethered to the tube so it cannot be dropped or lost mid-show, a small detail that matters when you are re-rigging at a venue every night.
Bolted joints on the bar and the span
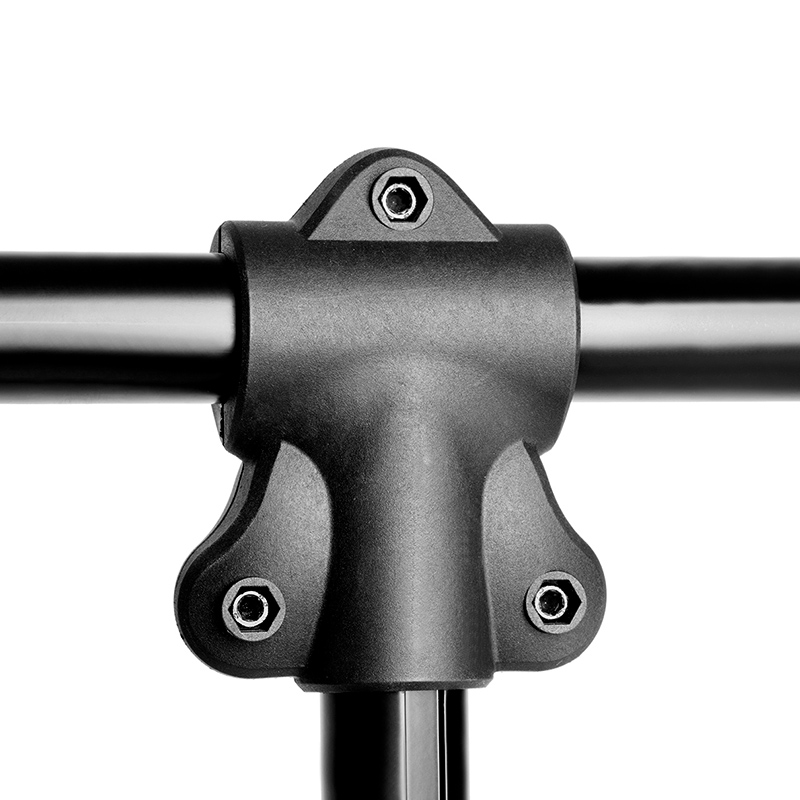
Where the T-bar meets the upright, or where a two-piece truss span joins in the middle, the connection should be a through-bolted joint with locking hardware — not a slip fit that relies on gravity. The triangle truss span on the LS008 uses bolted T-junction plates at each node, which keeps the span rigid and makes any missing bolt obvious during a pre-show inspection.
Feet, forks and floor contact
Rubber feet do two jobs: they grip the floor and they isolate the stand from the building’s structure. Check that all three feet are intact and sitting flat. A missing foot tip turns a stable tripod into a three-legged stool with one short leg — stable until someone leans on it.
Cable Discipline Around the Stand
Lighting stands generate cables: fixture tails, data lines, power drops. On a small stage the cable run from a T-bar or truss leg is one of the most common trip hazards in the room. Keep signal and mains separated and labelled, route drops down the inside of the tripod where feet and legs shield them, and tape or cover every crossing where the run leaves the stand. For the wider discipline of separating lighting data from audio and mains on a shared stage, see our guide on power and signal on the same stage, and for planning the audio side of a compact rig, the checklist in which cables a DJ booth actually needs covers the signal chain end to end.
A Pre-Show Checklist for T-Bar and Truss Stands
Crews that never have lighting incidents are simply the ones that check the same short list every time. Before doors:
- Rated capacity confirmed. The fixture schedule on each bar or span is written down, and its total sits inside the stand manufacturer’s rated figure.
- Collars pinned. Every height collar is tight and its positive-stop pin is engaged.
- Joints bolted. Every through-bolt on the bar, the span junctions and the clamps is present and snug.
- Safety cables fitted. Every fixture has a secondary fixing independent of its clamp.
- Legs fully spread. All tripod legs open evenly, feet flat and intact, no leg in a walkway.
- Cables dressed. Drops routed inside the leg line, crossings taped or covered, data and mains separated.
- Height margin checked. Clearance between the top of the rig and the ceiling, doors and ducting.
- Balance checked. The bar sits level; heavy fixtures sit close to the upright.
The whole inspection takes less than five minutes with two people, and it is the same whether the rig is one T-bar stand or a 3-metre truss span.
Choosing Stands That Make Safety Easy
Hardware cannot replace discipline, but it can make discipline cheap. Features that help: positive-stop pins behind every friction clutch, tethered knobs, bolted rather than slipped joints, a bar profile that standard clamps grip properly, and a footprint that stays planted at working height. That is the design brief behind the Yinyu lighting stand range from LESOUND — from the single-upright LS121 T-bar stand to the LS008 two-tripod truss set with its foldable 1.2-metre bars and 3-metre span, both engineered to pack down for mobile crews and set up the same way every night.
If you are specifying lighting stands for a rental fleet, a mobile DJ rig or an installation in a small venue, the lighting stands range page lists the current line-up, and our notes on T-bar, truss and height choices for DJs cover how to match a stand format to a room. To talk through a fleet specification or OEM requirements with the LESOUND team, start from the DJ booth category or the speaker stands range, where the same 35 mm collar standard runs across the stand family.
Post time: Nov-10-2026